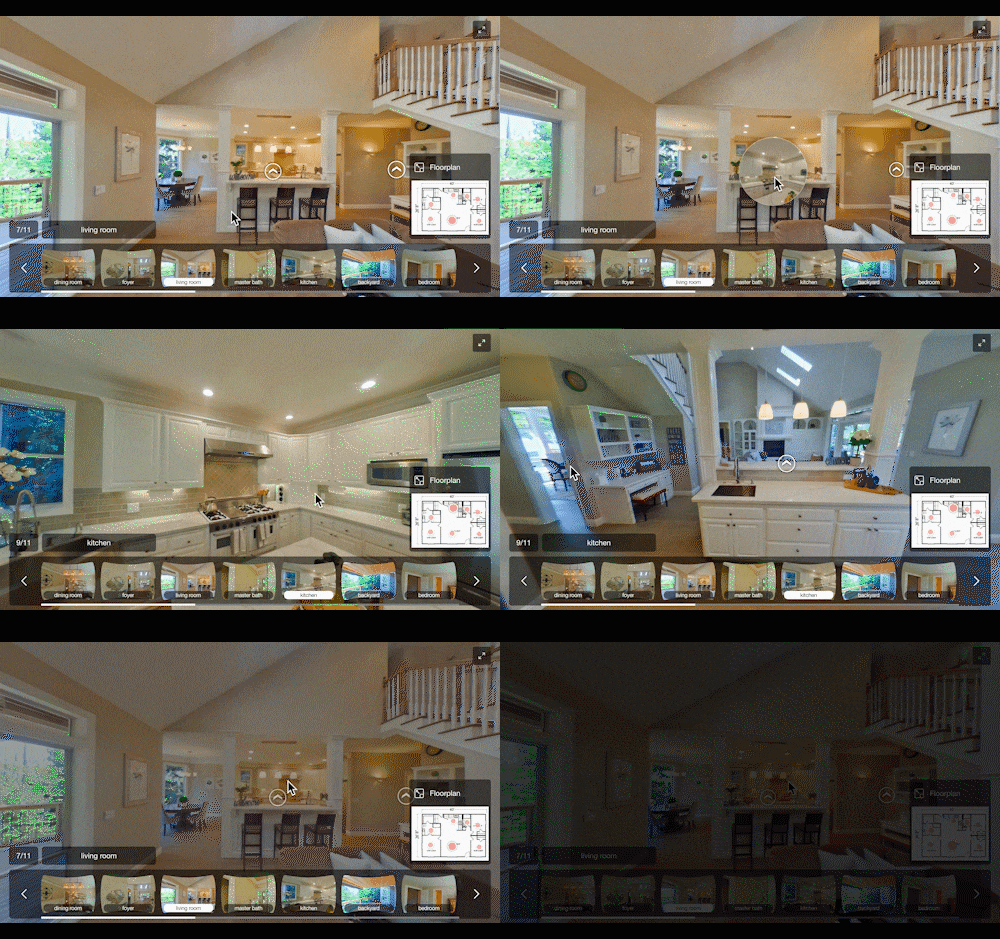
There are 2 great features you can use to edit your tour.
Now that we know how to shoot 360 images from STEP 1, it's time to enhance your tour using Tour Paths. In this step you will learn to make your tour more attractive.
It's best to use a computer for this step because the Tour Paths are easier to set on a computer with a larger screen than on a smartphone.
Sign In to your RICOH360 Tours account using your computer
app.ricoh360.com
What are Tour Paths??
Tour Paths is a function that allows you to move back and forth between images.
You can see the room as if you were actually walking through it.
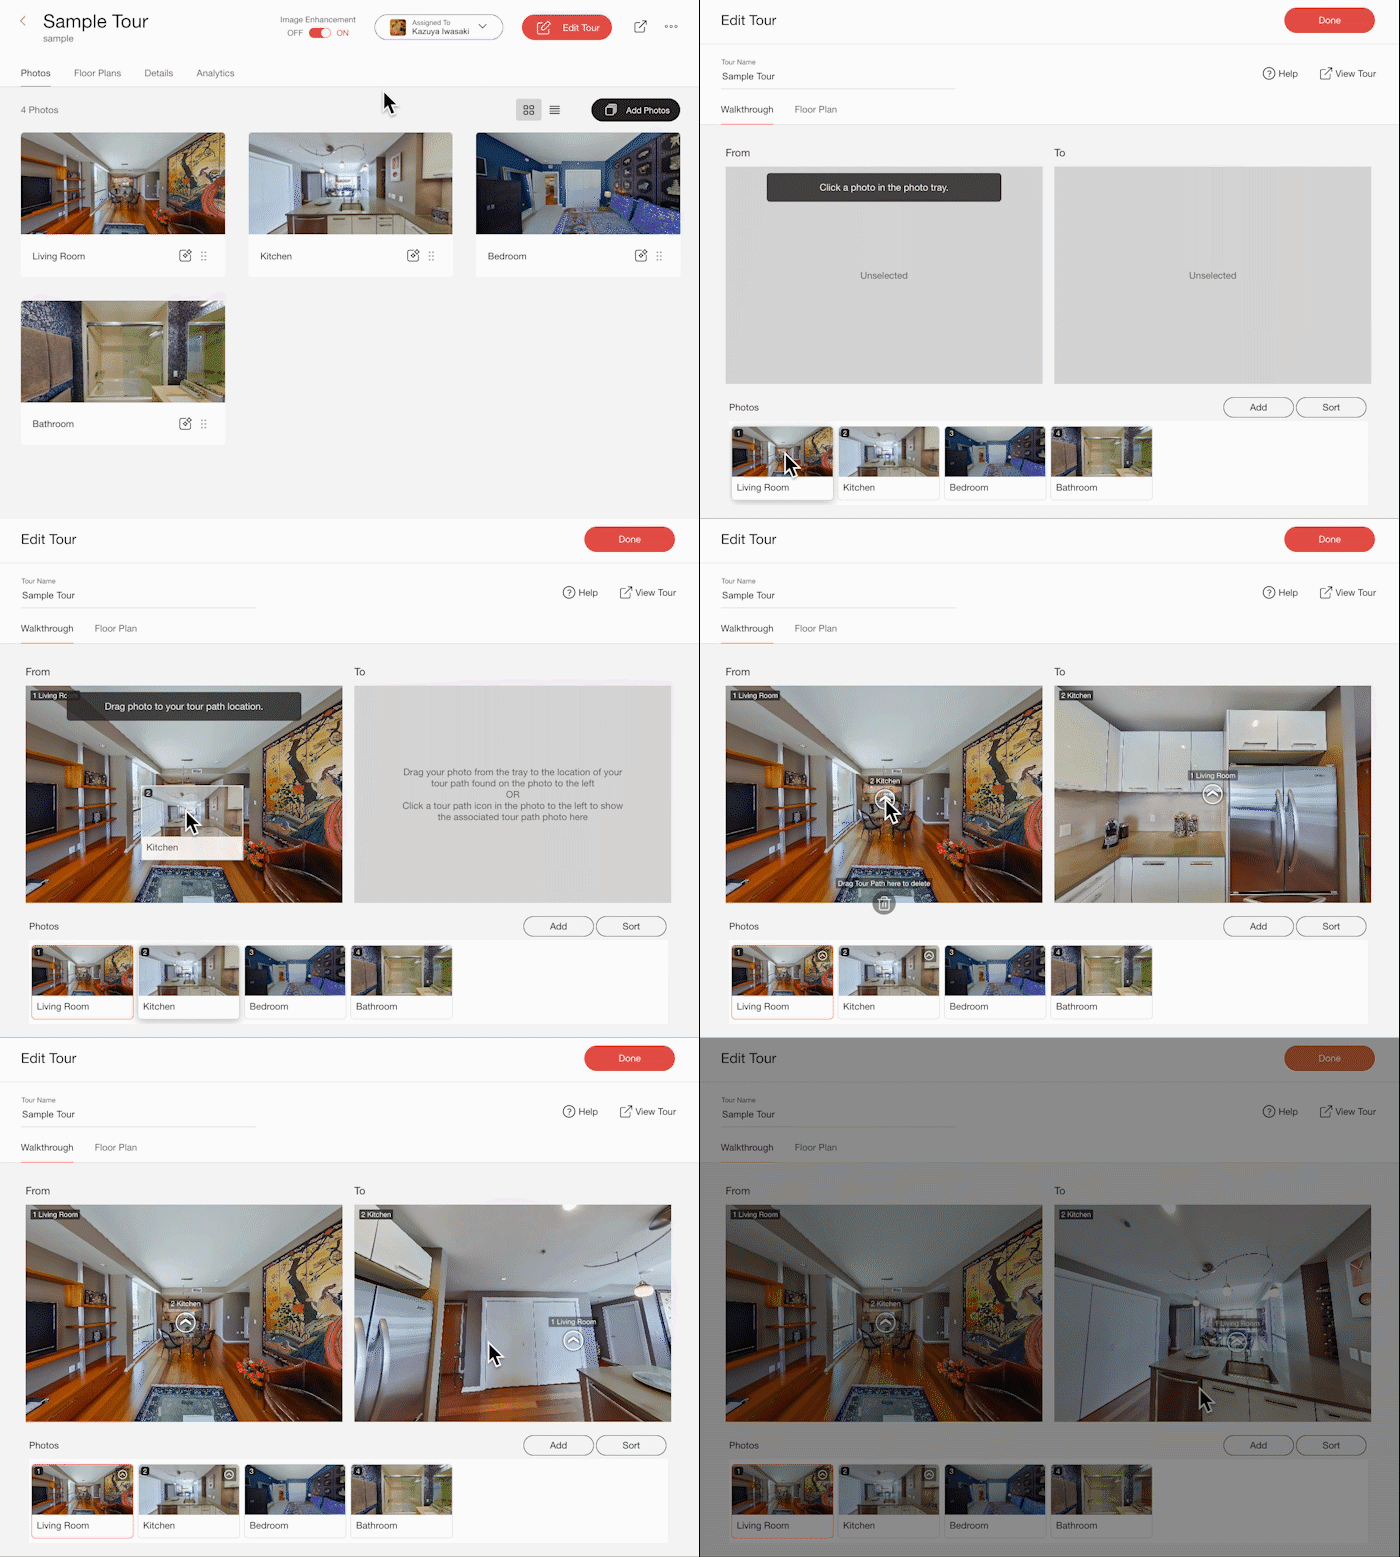
1. How to add Tour Paths
|
|
|
On the Right window, the room you are moving to (Return path) will display. You can reposition the arrow on the right image to the area you just came from so that when your client moves to that room they can go back to the room they just came from. Continue steps 3-5 for each room that you want to create tour paths for. |
2. How to edit your tour using Floor Plans
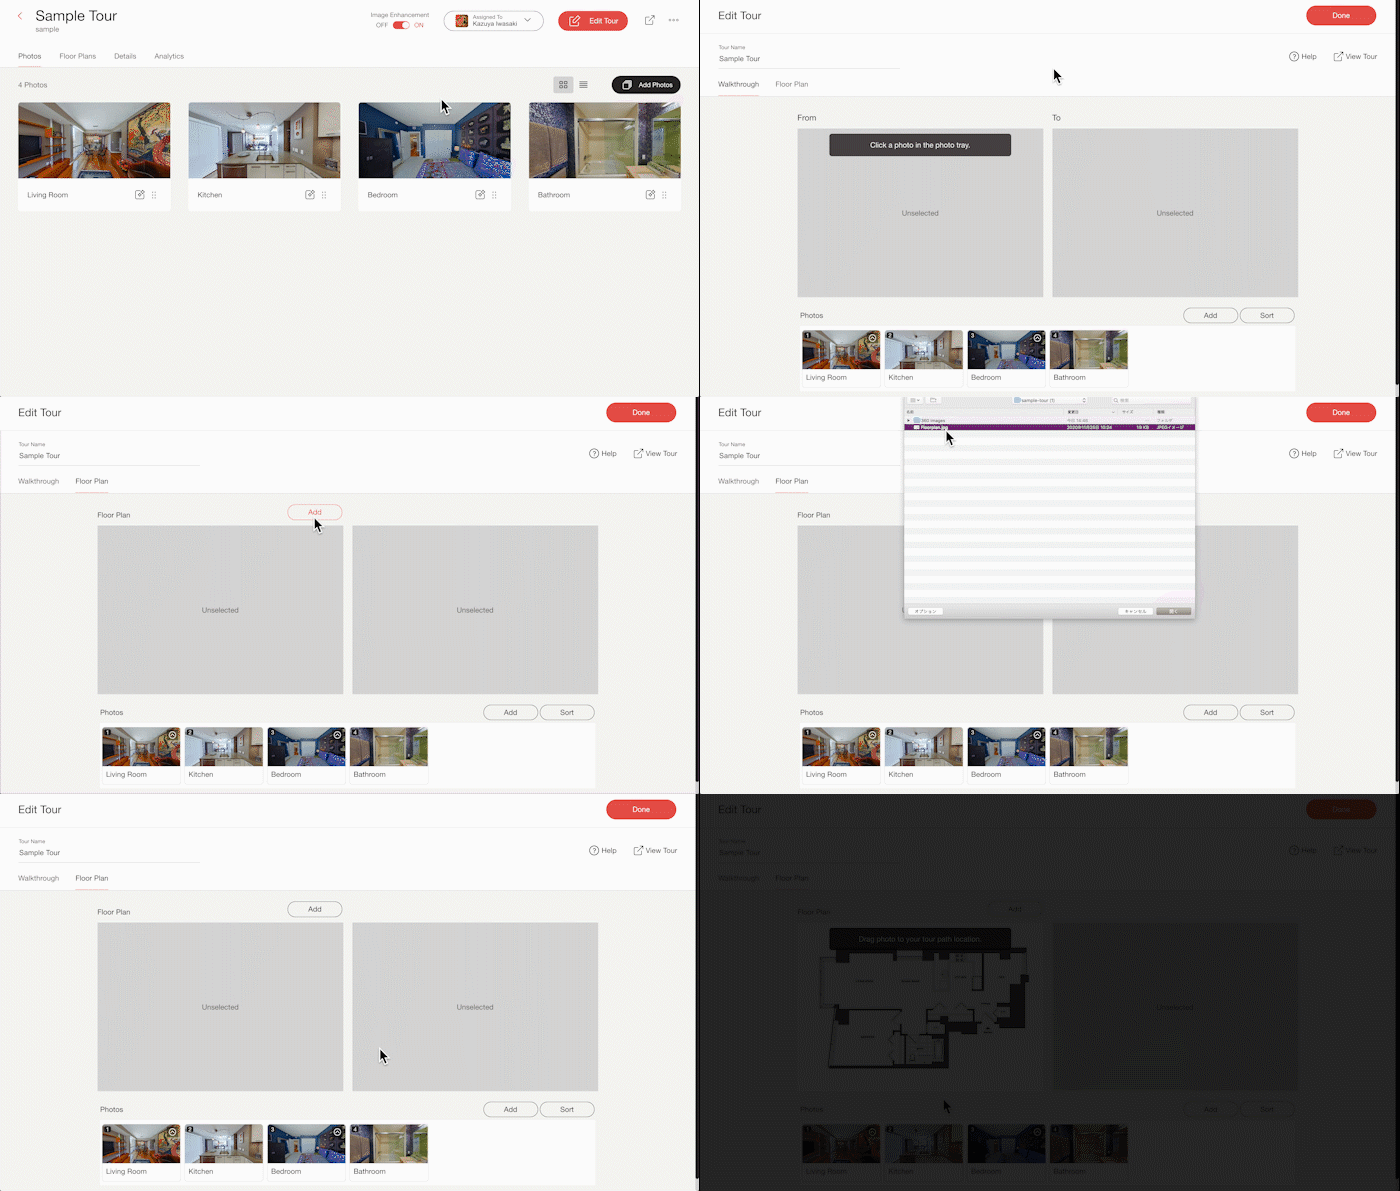
Uploading Floor Plans
|
|
| You can upload multiple floor plans. If you have more than one floor, follow the steps above to upload them. |
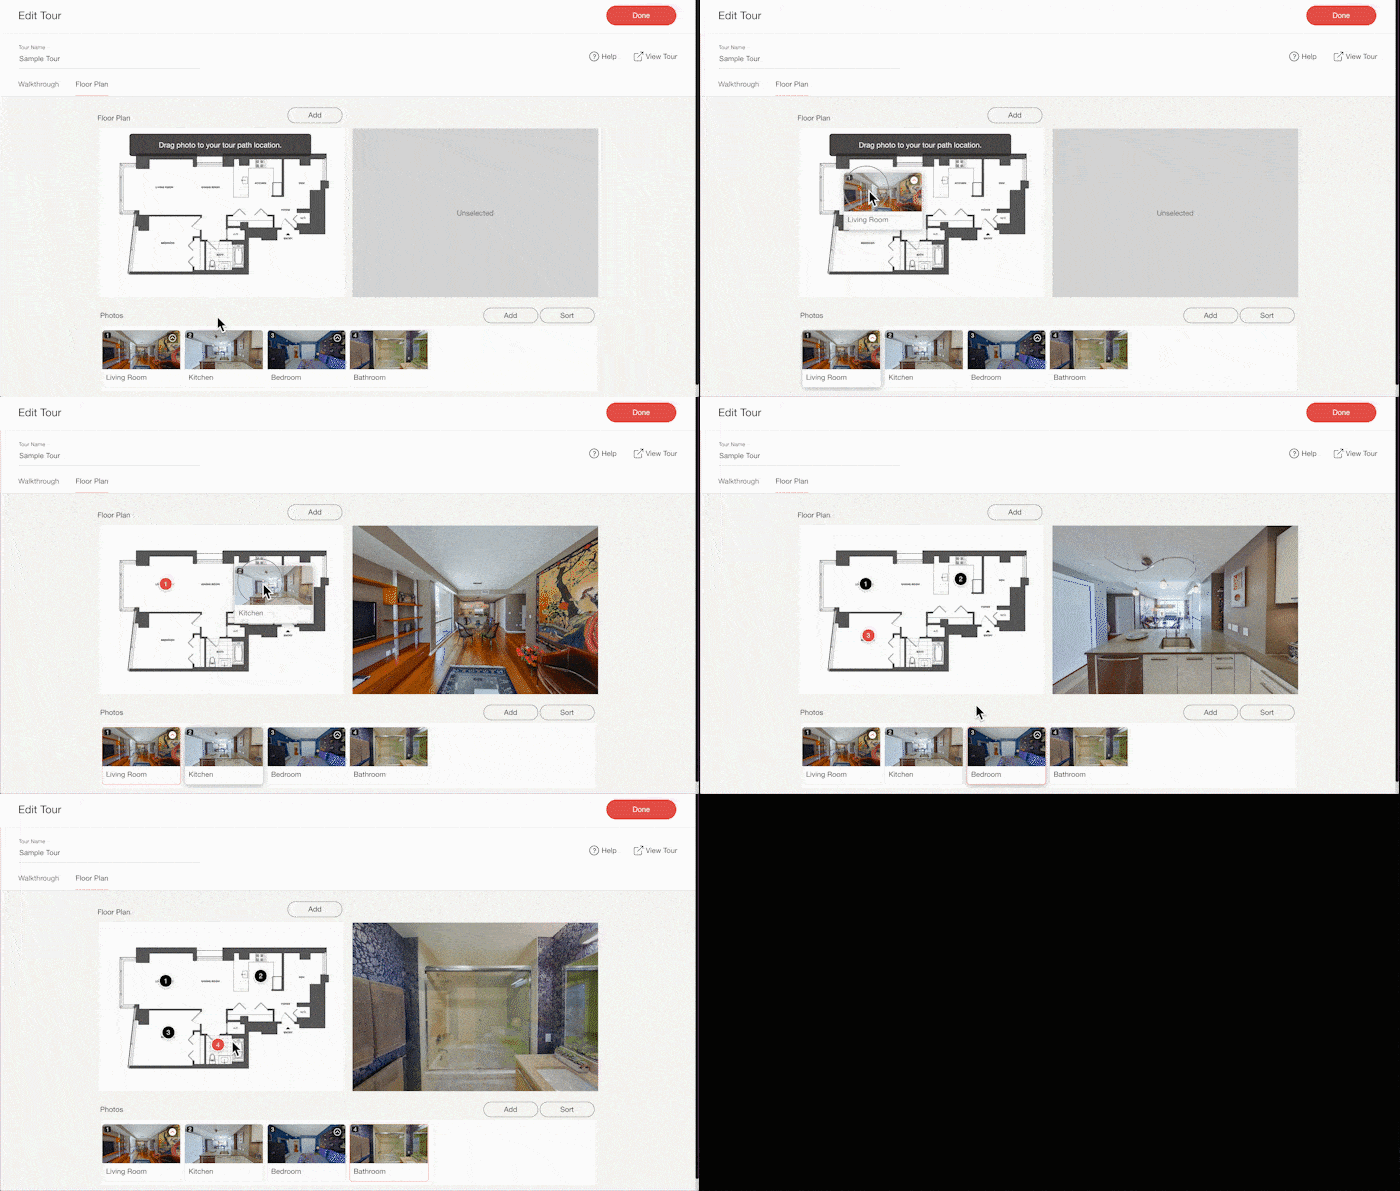
Linking images to the floor plan
|
|
~3 STEPS to create your own tour!~
STEP 1 : Create a tour by capturing your own 360° images --- using the Mobile App
STEP 2 : Enhance your tour with Tour Paths & Floor Plans--- using Web App
STEP 3 : Complete and share your virtual tour --- using Web App! ←Next!


